Showing posts with label Armour. Show all posts

Monday, 1 February 2016

Messing Around with a Light Box


I decided a while ago that I need to improve the photos I take for the blog. I tend to find that even with lots of lights on them they are dark, especially in the winter when there is very little natural light around.

I know that a lot of people use light boxes so after finding a cheapo one on Amazon for £7.99, I took the plunge. The light box itself is just an expanding wire framed box with white cloth over it. I didn't get the set that comes with lights because I decided in the short term that I would see if I could use my daylight lamps.

After setting it up, here are the results:


Here is a comparison shot of my recent Skaven both how I normally to do the photos (top) and the light box one (bottom):


I can't personally see a massive difference, perhaps I need some better lights? Also, ironing the back ground cloths that come with the light box wouldn't hurt. The main positive is that it doesnt matter how dark and miserable the weather is, the light will be constant.

Saturday, 28 November 2015

Panzer IV Complete

Realised the other day that I don't think I have posted a single painted model in November, figured I had best sort that out. I intended to do so earlier this week but the arrival of my newborn son somewhat distracted me!

Managed to finish off the Panzer IV that has been staring at me for about 8 weeks or so. It's the plastic kit from Warlord, not bad to put together. I painted it in the same style as my Hanomags, which was basically to hit it with my airbrush then weather it. I was happy with the final result, it should look just the part supporting my grenadiers across the battlefield.

So lets keep this simple, have some pictures:


I messed up a litte with the Schurtzen - I didn't put much effort into the back of it as I thought it would mostly be covered, but some of it shows. Oh well. I'm also still not sure if I have mastered the use of pigments - the different coloured mud was more by accident than design. What do you all think?

Plenty more to come over the next couple of weeks hopefully, got several things to update when time allows.


Wednesday, 9 September 2015

Puma and Panzer IV Progress

As any World War 2 war gamer will tell you, you need tanks. Infantry are the back bone of any force, but tanks are where it's at. 

So without that in mind, I have made progress on a bit of armour support for my Bolt Action German force. This required breaking out the airbrush. To say I found this worrying would be an understatement. Having used it once, I had stripped it down and cleaned it down before putting it back together. But would it work was the question? The answer was a resounding yes! For me, this is a great boon as it means I can use it more regularly because I was concerned that I had use it once and then broke it. 

Anyway, on to the pics. I went with the same scheme as the half tracks, here is the Panzer IV:


And here is the Puma:


They've also had the first stage of weathering in these pics, using a sponge I first applied hull red followed by metallics in the most worn areas. 

Still a long way to go with these, but hoping to get stuck into them soon. 

As always, more updates at The Cardboard Fortress

Thursday, 3 September 2015

Heaven Is A Half Track Part 3

It has taken far longer than I had originally planned but finally, the three half tracks that I started on a few months ago are done! I could say it was because I tried out new techniques, but the truth is that I was a bit afraid I would wreck them, so kept them at the back of the queue. 

But in any case, on with the pictures.

This was the first one done, you have already seen it in Part 2:


And the next one, with a bit of stowage added from a pack bought off of eBay:


And the third and final one:


And here are the three of them all together:


I think they look quite good together. They have been a great learning curve for some techniques, and if I were to do them again there are some things I would do differently. That all being said, I can now mechanize a whole platoon of infantry - just a shame transports aren't much good in Bolt Action!

Stay tuned for more updates to come, including more armour!

As always, please feel free to drop by my Facebook page, The Cardboard Fortress


Thursday, 13 August 2015

Heaven is a Halftrack, Part 2

I have to first explain my nearly month long absence - real life can be a pain sometimes. Work, children and holidays have all got in the way. I also always notice that isn't it worst when all you have to do is those few little bits? I can often find all the time in the world to get a model to the 90% stage, but sometimes getting that base done or that final highlight on eludes me. And I don't like posting half done stuff.

However, I have finally finished one of my three half tracks - my first Bolt Action armour. Here are some general shots:

Above you see the finished article. I am quite please with how this has come out overall, especially since it is the first real time I have airbrushed a tank.


Front and back shots. I did neglect the inside a little bit. I meant to heavily weather the inside foot area to represent all the ware and tear but forgot until quite late in the game and decided not to risk making a mistake. Finally, a close up of the weathering:


Essentially the techniques I have used after the base layers was sponge chipping, some oil washes then streaked before adding mud around the tracks and wheels. I then splattered some fresh mud up the side of the tank.

It's all been a good learning experience, and I feel ready to tackle the next one and maybe vary the weathering a little bit.

In the pipeline is another blog post within a week and some more grenadiers. Progress is being made!

As always, more regular updates on my facebook page, A Cardboard Fortress. Feel free to give me a like.


Friday, 15 May 2015

Heaven is a Halftrack Part 1


When I got back into the hobby many years ago, I remember being worried about painting vehicles more than anything. It was around the time Forge World was really taking off and all these awesome vehicles were popping up everywhere, weathered and beaten and ultra realistic. What's more, people kept talking about this fabled thing called an airbrush, so I bought one. And then it pretty much stayed in the gararge, unused and unloved.

I decided not long after getting into Bolt Action that this would have to change. I wanted my German vehicles to have decent looking camo and an airbrush seemed the only real way to do it. So I dug it out and dusted it down and when I had finished the infantry I decided it was all or nothing.

First step was to stowage up the vehicles (can't go wrong with a little stowage) and give them an undercoat. I don't know why but I find this stage very appealing as the undercoat really ties all the different materials used together by giving it a uniform caller.


When that was done, I got on with the airbrush. I used vallejo air paints, which didn't require thinning and speeded things up. Here you can see one with the base colour on and the first colour applied.


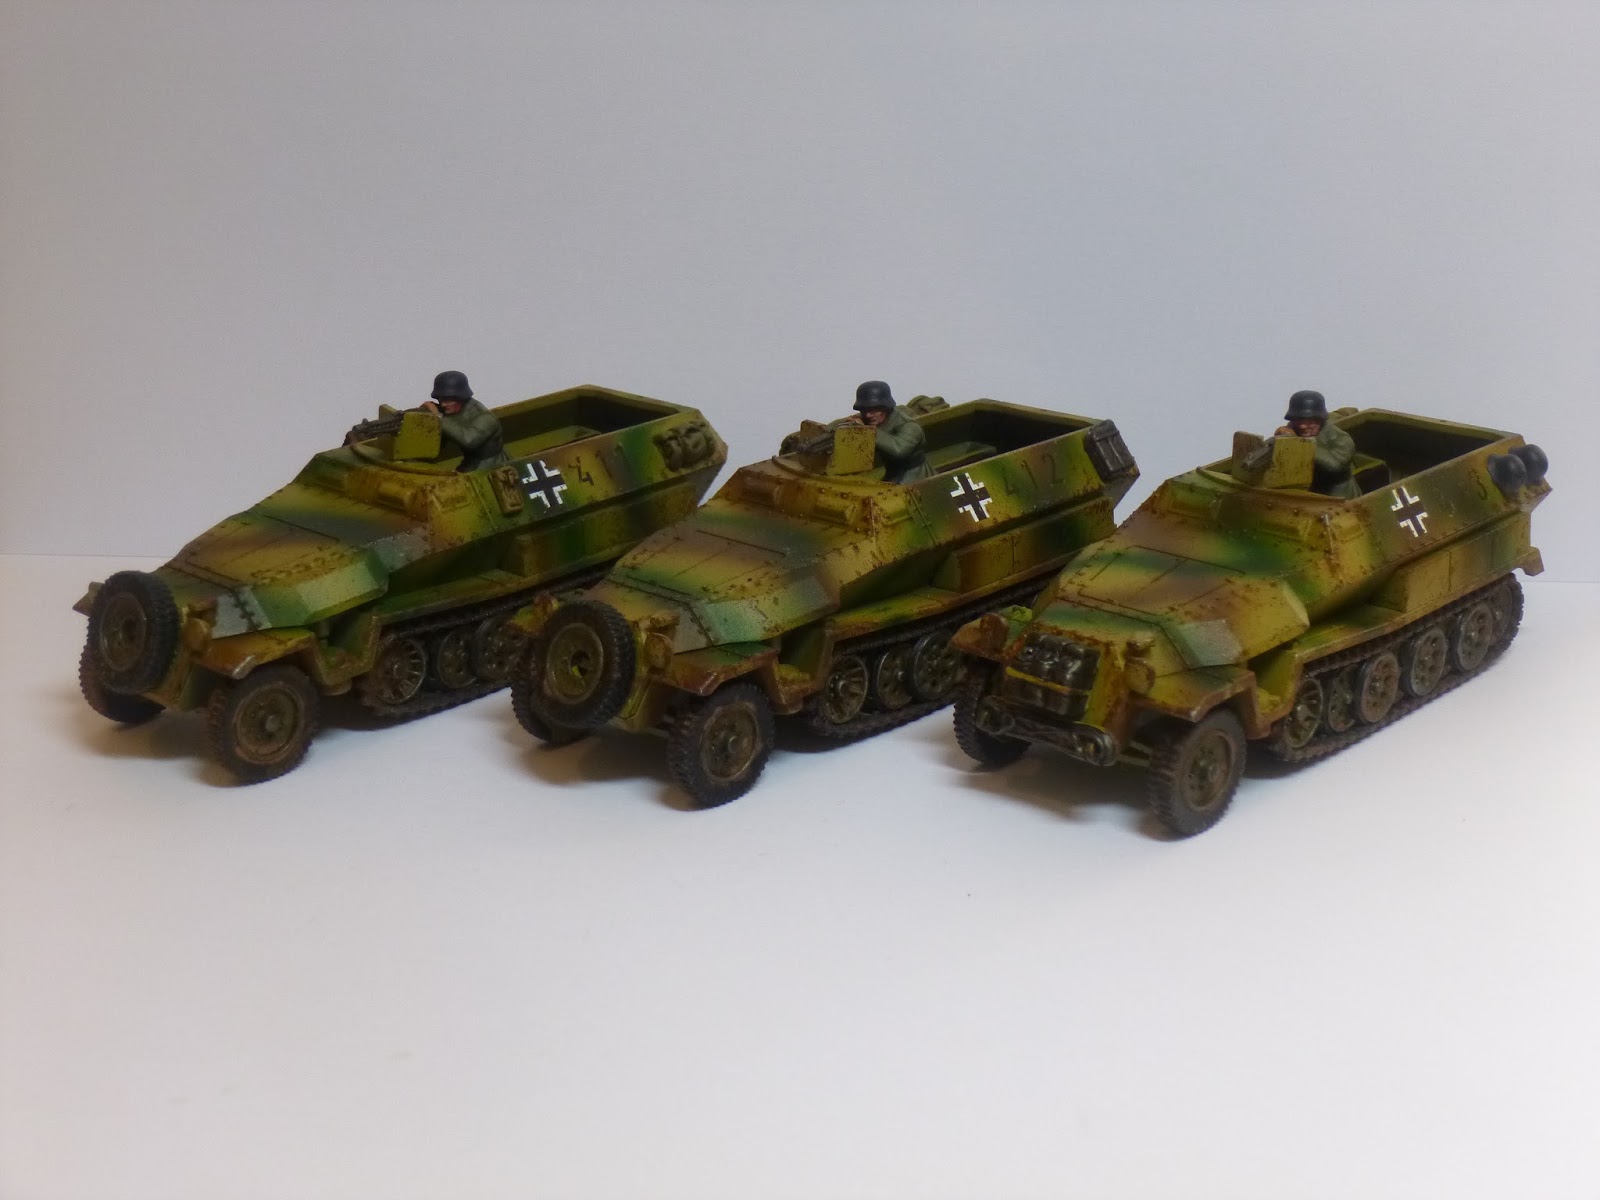
 By the time I had done with the airbrush, the three of them looked like this:


I learnt many things from using the airbrush. Some mistakes were made that I just about managed to cover up and I think I spent more time cleaning the airbrush down (especially at the end) than using it but I hope that this is something that will speed up with practice. I already have four more vehicles of my own to do and have volunteered to do three of a friends so should get plenty of practice in.

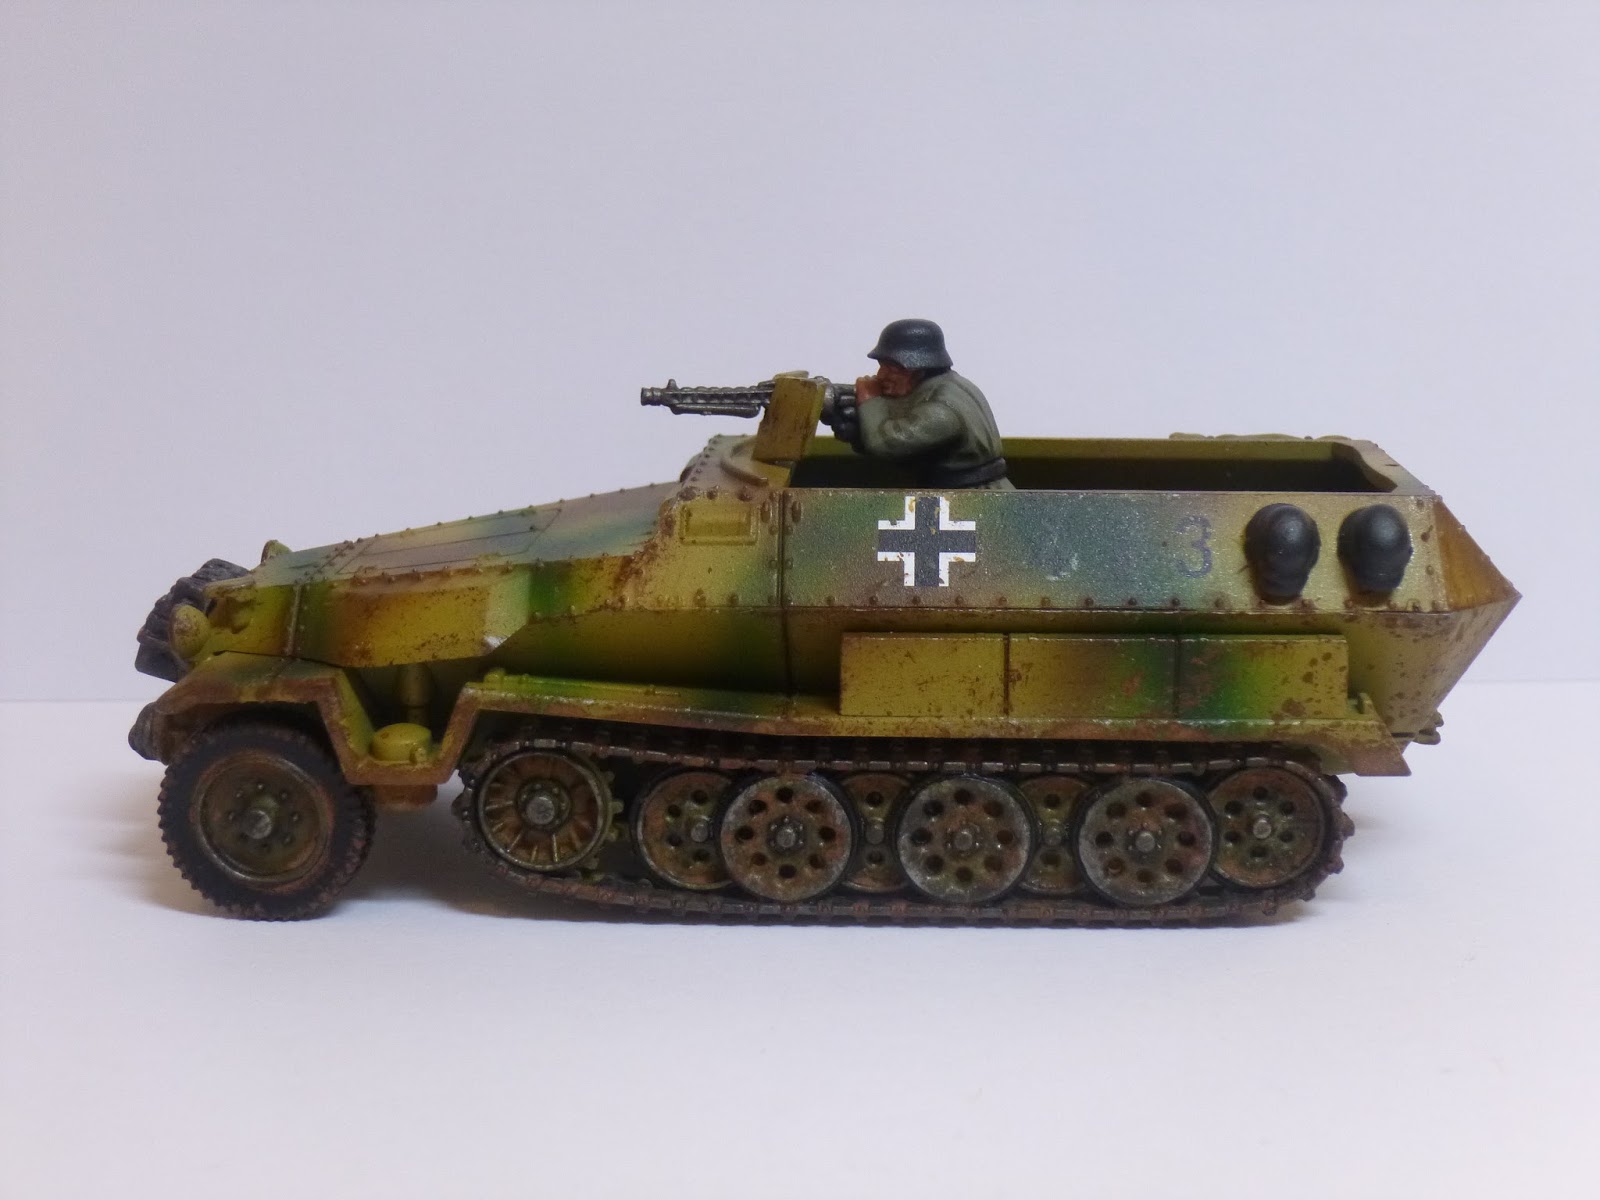
Once the airbrush was away it was an evening with the good old brush. I put the decals on first, weathered them in a bit and then chipped the hull down with some sponge work before doing the stowage. A few more bits and all three currently sit at this stage:


I am reasonably happy so far. The tracks need doing before I seal them with gloss varnish and then use some oils to weather them, before appplying pigment. All stuff that is new to me.

So, in summary things I have learned so far is patience with the airbrush and some rough techniques. I also need to get some Microsol and Microset for decal work. But other than that, what progresss! In my 40k days, using normal paints and brushes, a Chimera would have taken me about two weeks. This took my maybe 2 hours in the afternoon and three hours in the evening. So at least I am speeding things up!